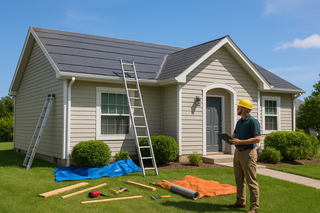
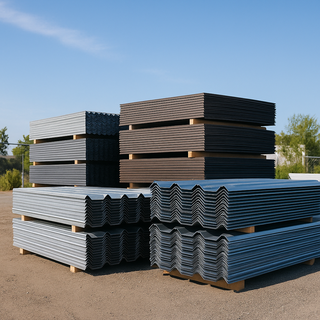
Installing a metal roof is one of the most impactful upgrades you can make to your home. Metal roofing offers exceptional durability, energy efficiency, and long-term savings, but proper preparation is critical to ensuring a smooth, successful installation. Whether you're hiring a professional contractor or considering a DIY project, preparing your home before the first panel is laid can make all the difference.
In this comprehensive guide, you will learn everything you need to do to get your home ready for a metal roofing installation—from budgeting and planning to pre-installation site preparation.
Step 1: Budgeting and Planning
1.1. Assess Your Needs and Goals
Before you begin selecting colors and finishes, clarify why you are installing a metal roof. Is it for longevity, energy savings, resale value, aesthetics, or a combination? Defining your goals will help you make informed choices on materials and accessories.
1.2. Calculate a Realistic Budget
While metal roofs are more expensive upfront than asphalt shingles, they offer greater value over time. Your budget should account for:
-
Roofing materials (panels, fasteners, underlayment)
-
Trim and accessories (ridge caps, flashing, venting)
-
Labor (if hiring a contractor)
-
Permits
-
Equipment rental (if DIY)
-
Contingency funds for unexpected repairs
1.3. Gather Multiple Quotes
If hiring a contractor, get at least 3 quotes from licensed metal roofing specialists. Compare not only prices but also what’s included (warranty, labor, disposal, permits, etc.).
Step 2: Design and Material Selection
2.1. Choose the Right Metal Roofing Type
There are several types of metal roofing systems:
-
Standing Seam: Sleek, modern, hidden fastener system
-
Exposed Fastener Panels: Cost-effective and easier to install
-
Metal Shingles and Tiles: Designed to mimic traditional roofing styles
-
Corrugated Panels: Often used in agricultural or rustic designs
2.2. Color and Finish
Consider your climate, home style, and energy goals when selecting color and finish:
-
Lighter colors reflect more heat
-
Matte finishes reduce glare
-
Stone-coated or textured finishes offer more traditional aesthetics
2.3. Trim, Flashing, and Ventilation
Plan for ridge caps, eave trim, gable trim, snow guards (if applicable), and proper ventilation. These components are critical for both function and curb appeal.
Step 3: Secure Permits and Comply with Local Codes
3.1. Check Local Building Codes
Each area has specific regulations regarding metal roofing installation, including wind uplift standards, fire ratings, and structural requirements.
3.2. Apply for Permits
Most municipalities require permits for roofing projects, whether DIY or contracted. Ensure all permits are secured before beginning the installation.
3.3. Review HOA Guidelines
If you live in a neighborhood with a homeowners' association, confirm that your metal roof design and color comply with its regulations.
Step 4: Prepare the Site
4.1. Remove Obstacles
Clear driveways, pathways, and areas around your home of vehicles, furniture, and landscaping elements to provide easy access for workers and equipment.
4.2. Protect Landscaping
Cover shrubs, plants, and delicate areas near the home with tarps or protective materials to shield them from falling debris.
4.3. Notify Neighbors
Metal roof installations can be noisy and may involve traffic or temporary inconveniences. Giving neighbors advance notice helps maintain good relationships.
Step 5: Preparing the Structure
5.1. Inspect the Roof Deck
Before installing metal panels, ensure the roof deck is structurally sound. Look for:
-
Rotting wood
-
Sagging sections
-
Water damage
-
Nail or fastener failures
Replace or repair damaged areas to provide a stable base for the new roof.
5.2. Remove Old Roofing (if necessary)
While metal roofs can sometimes be installed over old shingles, this depends on your local codes and the condition of the existing roof. Removing the old roof may reveal hidden damage and improve performance.
5.3. Install or Update Underlayment
Underlayment adds a moisture barrier and helps reduce noise. Depending on your climate, you may choose:
-
Synthetic underlayment (common)
-
Ice and water shield (for colder regions)
-
Felt paper (budget-friendly but less common with metal roofs)
Step 6: Prepare for Weather
6.1. Plan Around the Weather
Avoid scheduling the project during seasons with heavy rain, snow, or high winds. Metal roof installations require dry conditions for safety and performance.
6.2. Prepare Temporary Protection
Have tarps or temporary weather protection available if unexpected weather strikes mid-project.


