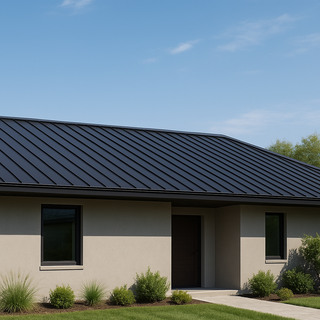
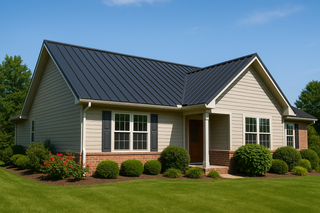
Adding skylights, vents, or chimneys to your metal roof can transform your home by bringing in natural light, improving airflow, and enhancing functionality—but these roof penetrations must be handled with precision. One wrong cut or poorly sealed flashing, and your sleek, durable metal roof becomes vulnerable to leaks, rust, and costly damage.
At Top Tier Metals, we supply premium metal roofing to DIYers and contractors alike—and we’ve seen firsthand what separates a flawless install from a flawed one. This guide walks you through everything you need to know about safely and effectively adding roof penetrations to your metal roofing system without compromising performance, warranties, or aesthetics.
1. Understanding the Risk: Why Roof Penetrations Fail
Metal roofing is extremely watertight by design, but when you create an opening—like for a skylight or pipe—you also create a vulnerability. Most common causes of leaks around penetrations include:
-
Improper flashing: Poor-quality or incorrectly installed flashing allows water to pool or sneak in.
-
Thermal movement: Metal expands and contracts with temperature changes, which can pull sealants apart over time.
-
Incompatible materials: Galvanic corrosion can occur if dissimilar metals (like aluminum and copper) touch.
-
Sealant overuse or failure: Relying on caulk alone instead of proper mechanical solutions.
-
DIY shortcuts: Rushed or improper cuts around protrusions can’t be fixed with a tube of silicone.
2. What Type of Metal Roof Are You Working With?
Your approach will vary based on your panel profile and roofing system:
| Metal Roof Type | Penetration Complexity | Notes |
|---|---|---|
| Standing Seam (Snap-Lock / Mechanical) | Moderate | No exposed fasteners, requires flashing integration |
| Exposed Fastener (R-Panel / Corrugated) | Easier but higher leak risk | Fasteners and flashing must be sealed tightly |
| Stone-Coated Steel Shingles | High | Complex flashing due to layered design |
Top Tier Tip: Use panel-specific flashing kits or fabrications designed for your exact profile.
3. Adding a Skylight to a Metal Roof
Step-by-Step Overview:
1. Location Planning
-
Choose a location between roof framing members (typically between rafters or trusses).
-
Avoid placing skylights near valleys or water-shedding areas.
2. Flashing Matters Most
-
Always use step flashing around the sides and saddle flashing on the top side.
-
For standing seam panels, you’ll need a custom curb-mounted skylight flashing kit.
3. Curb-Mounted vs. Deck-Mounted
-
Curb-mounted skylights are elevated and ideal for metal roofs.
-
Deck-mounted skylights sit flush, but they’re harder to flash correctly on metal.
4. Underlayment and Ice/Water Shield
-
Add a peel-and-stick membrane (like Ice & Water Shield) around the opening before installing the skylight and flashing.
-
Overlap metal panels over the bottom edge of flashing to shed water downhill.
5. Don’t Rely on Caulk
-
Use mechanical fasteners, butyl tape, and pre-bent metal flashings. Sealants should be backup—not the first line of defense.
4. Installing Vents and Pipe Penetrations
Common types include:
-
Plumbing vent stacks
-
Bath or kitchen exhausts
-
Wood stove or HVAC flue pipes
Use a Pipe Boot (Flashing)
| Pipe Boot Material | Best For | Lifespan |
|---|---|---|
| EPDM Rubber | Standard plumbing vents | 15–25 years |
| Silicone High-Temp | Stoves, furnaces, hot flues | 30+ years |
| Metal Flashing Collars | Custom aesthetics | Lifetime with proper sealant |
How to Install:
-
Cut a clean, tight-fitting hole through the metal panel and decking.
-
Slide the boot over the pipe and center it on the ridges.
-
Use butyl tape under the boot flange, then screw down with washered fasteners.
-
Apply a bead of polyurethane sealant around the edges—not silicone, which doesn’t adhere well to metal long-term.
5. Installing a Chimney in a Metal Roof
A chimney requires the most intricate flashing detail due to its size and height.
Best Practices:
-
Build a curb around the chimney to divert water.
-
Use step flashing up the sides, saddle flashing on the back, and apron flashing in the front.
-
Consider a cricket or diverter behind the chimney to shed water sideways (especially on wider chimneys).
-
Use high-temp underlayment and waterproof barriers beneath the entire system.
Pro Tip: If your chimney is near a roof ridge, plan the flashing to run beneath the ridge cap for full protection.
6. Integrating Flashing with Standing Seam Panels
Standing seam roofs require special flashing care because the vertical seams direct water.
| Area | Flashing Tip |
|---|---|
| Between seams | Flash under panel ribs to avoid damming |
| Over seams | Use Z-flashing or hemmed metal to step over ribs |
| Side laps | Use closure strips or foam fillers beneath flashing where ribs are cut |
Tools to Use:
-
Seamer (for mechanical seam types)
-
Aviation snips or nibblers (never grinders)
-
Hand brakes for bending flashing
7. Flashing Don’ts (Common Mistakes to Avoid)
-
❌ Flashing against ribs without bending or trimming
-
❌ Using caulk alone to seal pipe boots
-
❌ Cutting into panel ribs instead of between them
-
❌ Using dissimilar metals (e.g., copper chimney flashing with Galvalume roof)
-
❌ Installing deck-mounted skylights directly on metal panels
8. Compatible Sealants and Tapes
| Product | Use Case | Notes |
|---|---|---|
| Butyl Tape | Under flashing, pipe boots | Excellent long-term adhesion |
| Polyurethane Sealant | Gaps, flashing edges | Flexible, UV stable |
| Roofing Tape (Peel & Stick) | Seams, panel joints | Use under ridge caps and around penetrations |
| No Silicone! | Fails over time, not UV-stable on metal roofs |
9. Warranties & Code Compliance
Manufacturer Warranties:
-
Roof penetrations often void warranties if not installed per manufacturer spec.
-
Many paint warranties won’t cover corrosion from improper flashing or vent boots.
Local Building Codes:
-
Most require fire-rated venting for fireplaces and minimum clearance from combustibles.
-
In high-wind or snow-load zones, additional bracing or flashing steps may apply.
10. DIY or Hire a Pro?
| Situation | DIY or Pro? |
|---|---|
| Adding a small pipe boot | ✅ DIY (with proper tools) |
| Installing a skylight | ⚠️ Pro recommended unless experienced |
| Replacing chimney flashing | ✅ Pro-only unless you’re advanced |
| Cutting standing seam panels | ✅ DIY with snips / ✅ Pro with seamer |
Final Thoughts: Leak-Free Metal Roof Penetrations Start with the Right System
Metal roofs are one of the most durable and weather-tight roofing options available—but penetrations are the one place they can fail without proper flashing and planning.
Whether you're adding a skylight for more natural light, venting a new kitchen, or flashing around a chimney, always prioritize:
-
The right flashing
-
Compatible sealants and underlayment
-
Panel-specific installation techniques
-
Long-term, maintenance-friendly methods
Need Custom Flashing or DIY Support?
Top Tier Metals offers pre-bent flashing kits, custom pipe boot packages, and layout help for homeowners and contractors.
👉 Request a Quote or Talk to a Specialist
📦 We ship directly to your job site with all fasteners and instructions included
Top Tier Metals — Premium Roofing. Built to Protect.


