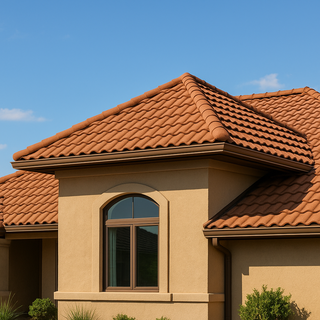
If you love the warm Mediterranean look of barrel tile but want higher performance at a lower weight, Decra Villa Tile is one of the strongest premium options on the market. It is a stone-coated steel system engineered to replicate clay or concrete tile while delivering the resilience and longevity of steel. This guide breaks down how Villa Tile performs in real conditions, what it costs, where it shines, where it does not, and how to install it the right way to protect your investment.
What Decra Villa Tile is and how it is made
-
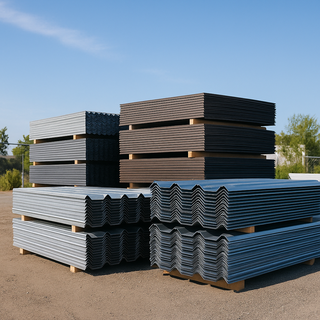
Core material: corrosion-resistant steel panel formed into a classic barrel profile
-
Coating stack: zinc-aluminum or galvalume style metallic coating, acrylic primer, stone granules for texture and color, and a clear acrylic overglaze for UV protection
-
Panel format: interlocking panels with concealed fasteners that create continuous water shedding from ridge to eave
-
Look: authentic two-piece barrel tile appearance with deep shadow lines and multi-tone granule blends
Performance at a glance
-
Lifespan: commonly 40 to 50 plus years with proper installation and care
-
Impact resistance: Class 4 hail resistance rating on most assemblies
-
Fire rating: Class A fire performance when installed over approved underlayments
-
Wind resistance: tested for high wind uplift; many assemblies are approved for coastal and hurricane-prone regions
-
Weight: roughly 1.4 to 1.6 lb per square foot, about 140 to 160 lb per roofing square
-
Noise: quiet on solid sheathing with modern underlayments and attic insulation
-
Energy: reflective granule color options plus an optional batten airspace can reduce heat transfer
Decra Villa Tile vs traditional clay or concrete tile
| Feature | Villa Tile (stone-coated steel) | Clay or Concrete Tile |
|---|---|---|
| Weight | About 140–160 lb per square | 800–1200 lb per square |
| Structural demand | Usually no structural reinforcement | Often requires reinforcement of trusses or rafters |
| Impact resistance | Class 4 hail on many assemblies | Clay can crack under impact; concrete fares better but still chip prone |
| Freeze-thaw durability | Excellent | Clay and concrete can absorb moisture and spall in freeze-thaw zones |
| Aesthetics | Textured stone granules replicate tile | Authentic material |
| Maintenance | Low | Replace cracked pieces, maintain flashings, manage sliding pieces |
| Cost installed | Mid to high | Mid to high, varies by region |
| Roof pitch | Best at 3:12 and steeper | Commonly 4:12 and steeper, varies by manufacturer |
Bottom line: You get the tile look without the structural burden, along with better impact and freeze-thaw performance.
Pros and cons of Decra Villa Tile
Pros
-
Premium curb appeal with deep, shadowed tile profile
-
Much lighter than concrete or clay tile
-
Excellent hail, wind, and fire performance
-
Interlocking panels resist wind-driven rain
-
Long warranties and proven stone-coated technology
-
Compatible with snow guards and solar attachments when detailed correctly
Cons
-
Higher upfront cost than asphalt shingles
-
Granulated finish can be marred by abrasive cleaning or careless foot traffic
-
Requires installers trained in stone-coated systems, not all roofers have this experience
-
Minimum pitch requirements; not suitable for low-slope commercial roofs
Color blends and style notes
Villa Tile is known for blended, natural tones that mimic clay firing variations. Expect multi-tone browns, terracotta, charcoal blends, and coastal sand hues. Multi-blend colors do the best job of hiding dust and pollen and keeping the look natural from the street.
Roof pitch and design requirements
-
Minimum recommended pitch: commonly 3:12; check project approvals and local code
-
Best practice eaves: starter strip with bird-stop style closures to block wind-driven rain and pests
-
Valleys: open metal valleys with W-style or ribbed valley metal sized for local rainfall
-
Transitions and walls: use manufacturer step and end wall flashings with counterflashing under siding or stucco
Realistic cost ranges
Pricing varies by region, access, and roof complexity. Typical ranges:
-
Materials only: 5.50 to 8.50 per square foot
-
Installed total: 12.00 to 18.00 per square foot
What pushes price up:
-
Complex hips and valleys, turrets, and heavy cut-up geometry
-
Steep slopes and multi-story access requiring extra safety and staging
-
Coastal specialty fasteners and accessories
-
Tear-off and disposal of multiple shingle layers
-
Premium underlayments and high-temperature ice-barrier zones
Ways to control cost without compromising quality:
-
Keep penetrations consolidated and properly flashed
-
Choose a stocked color to shorten lead time and reduce freight
-
Use a high-quality synthetic underlayment and ice barrier only where code requires
Underlayment and ventilation
-
Underlayment: use a premium synthetic underlayment with high tear strength; add ice and water protection at eaves, valleys, and penetrations per code
-
Battens vs direct-to-deck:
-
Batten system: elevates panels to create an airspace that cools the deck and promotes drainage; excellent in hot or mixed climates
-
Direct-to-deck: faster installation and lower profile in windy zones; follow manufacturer fastening patterns
-
-
Ventilation: balance intake at the eaves with ridge ventilation; use compatible ridge vents made for tile profiles or concealed metal ridge vents
Fasteners and accessories
-
Use corrosion-resistant fasteners designed for stone-coated steel panels
-
Match color-blended touch-up kits for cut edges and small scratches
-
Install foam closures at rakes, hips, and ridges to control wind-driven rain and pests
-
Use compatible pipe boots and flashings; avoid dissimilar metal contact
Installation sequence overview
-
Remove old roofing if required and repair any damaged decking
-
Install drip edge, ice barrier, and synthetic underlayment per code and climate
-
Lay out battens if specified, maintaining straight lines and proper spacing for panel lock
-
Install starter and eave closures
-
Set first course of Villa Tile panels, square to eaves and valleys
-
Fasten per pattern, staggering seams and maintaining side laps into the prevailing wind
-
Flash valleys, sidewalls, headwalls, skylights, and chimneys using manufacturer metals
-
Cap hips and ridge with matching components and continuous ridge ventilation
-
Seal exposed cuts with manufacturer touch-up as directed
-
Final inspection: fastener seating, panel engagement, valley cleanliness, and attic ventilation
Maintenance and care
-
Annual inspection: check roof edges, ridges, and valleys for debris or uplift
-
Gutter care: keep gutters and downspouts clear to protect valleys and eaves
-
Cleaning: rinse with low pressure water and a soft brush only where needed; avoid harsh chemicals and high-pressure washing
-
Foot traffic: step in the low areas of the profile close to battens or supports
-
After hail or storms: look for denting, dislodged granules in gutters, or disturbed ridge components
Where Villa Tile is a great fit
-
Mediterranean, Spanish, Mission, and Tuscan inspired architecture
-
Coastal regions requiring corrosion resistance and high wind performance
-
Hail-prone states seeking Class 4 impact resistance and possible insurance discounts
-
Freeze-thaw climates where clay and concrete tiles struggle with moisture absorption
-
Retrofits where structural limits rule out heavy tile
Common questions
Will it rust
Not when installed correctly. The metallic coating under the stone layer provides sacrificial protection, and the acrylic overglaze shields the granules. Keep cut edges sealed per instructions.
Is it noisy in the rain
No on solid decking with underlayment and attic insulation. Many owners report similar or lower sound levels than shingles.
Can it be installed over existing shingles
In some jurisdictions the system can be installed over one asphalt layer with battens. Always verify local code and the manufacturer assembly you are using.
Can I add solar
Yes. Use rail systems designed for metal and follow the manufacturer attachment details to preserve weather integrity.
Villa Tile vs standing seam metal
Choose Villa Tile if you want Old World texture, heavier shadow lines, and a warm, traditional look with stone granule color blends.
Choose standing seam if you prefer crisp, modern lines, a smooth finish, and maximum snow shedding in cold climates.
Spec and selection checklist
-
Roof pitch 3:12 or greater
-
Premium synthetic underlayment plus ice barrier at eaves and valleys
-
Battens specified or direct-to-deck per climate and wind zone
-
Matching ridge, hip, rake, valley, and wall flashings from the system
-
Balanced intake and exhaust ventilation
-
Corrosion-resistant fasteners and compatible pipe flashings
-
Color blend selected to complement masonry, trim, and landscape tones
Final take
Decra Villa Tile delivers the tile look without the tile weight and with the all-weather durability homeowners expect from premium metal. When you combine a trained installer, the right underlayment package, and attention to ventilation and flashing, you can expect decades of service with minimal maintenance and standout curb appeal.