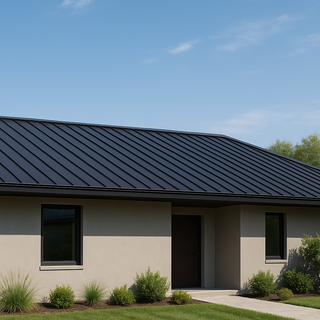
Not all roofs are steeply pitched — and not all metal roofing performs equally well on low-slope or flat roof structures. If you’re working on a home, garage, patio, or commercial space with a roof pitch of 3:12 or less, choosing the right metal roofing system becomes critical to preventing leaks, maintaining warranty coverage, and ensuring long-term performance.
In this comprehensive guide, Top Tier Metals explains the best metal roof profiles and waterproofing strategies for low-slope and flat roofs, including what not to use, how to install them, and what to expect in terms of maintenance and lifespan.
1. What Is a Low-Slope or Flat Roof?
Pitch Definitions:
-
Flat Roof: 0:12 to 0.5:12 slope
-
Low-Slope Roof: Greater than 0.5:12 but less than 3:12
-
Standard-Slope Roof: 3:12 and above
Why slope matters:
Metal roofing systems shed water through gravity. On low-slope surfaces, water doesn't drain as fast, which increases the risk of ponding, capillary action, and wind-driven rain infiltration.
That’s why you need the correct profile and waterproofing system designed specifically for low-slope conditions.
2. Why Asphalt and Shingles Often Fail on Low-Slope Roofs
Standard asphalt shingles are not rated for low-slope installation because they rely on overlapping layers and gravity for water shedding. On a low-slope roof:
-
Water seeps under shingle layers
-
Ice and snow can sit for days without draining
-
UV exposure is more direct and damaging
-
Capillary action can pull water backward into seams
Result? Frequent leaks, premature degradation, and denied insurance claims or manufacturer warranties.
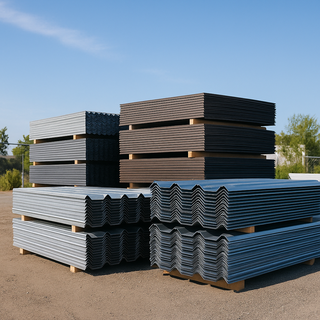
3. Best Metal Roof Styles for Low-Slope and Flat Roofs
Here are the most effective, long-lasting metal roofing systems for low-slope applications — from gentle pitches down to near-flat decks.
A. Mechanical Lock Standing Seam (Double-Lock)
Ideal Pitch: 0.5:12 to 3:12
Waterproofing Rating: ★★★★★
Features:
-
Panels are seamed together with a mechanical seamer to form a double-locked seam
-
Zero exposed fasteners
-
Strongest weather resistance of any panel
-
Works on commercial and residential applications
Pros:
-
Withstands ponding and ice dams
-
Compatible with waterproof membranes
-
No through-fasteners to leak over time
Cons:
-
Requires special seaming tools
-
Slower and more labor-intensive to install
Top Tier Use Case: Perfect for low-slope sections of homes, porches, or office buildings where long-term durability is critical.
B. Single-Lock Standing Seam
Ideal Pitch: 2:12 to 3:12
Waterproofing Rating: ★★★★☆
Features:
-
Similar look to double-lock but with one fold per seam
-
Often used for residential and light commercial
-
Easier and faster to install than mechanical lock
Pros:
-
Clean modern appearance
-
Durable with proper sealant and underlayment
Cons:
-
Not recommended for sub-2:12 pitch unless sealed with mastic or solder
-
Slightly less water resistance than double-lock
Top Tier Use Case: Residential homes with contemporary architecture and low-profile rooflines.
C. Snap-Lock Standing Seam (Not Recommended Below 3:12)
Ideal Pitch: 3:12 minimum
Waterproofing Rating: ★★☆☆☆
Features:
-
Panels “snap” together rather than being mechanically seamed
-
Popular in standard residential applications
-
Fast installation and lower labor costs
Cons on Low-Slope:
-
Not warrantied below 3:12 pitch
-
Risk of water infiltration at seams during heavy rain or snowmelt
Top Tier Verdict: Great profile — but do not use it on low-slope roofs.
D. Structural Seam Panels with Raised Ribs
Ideal Pitch: 1:12 and up
Waterproofing Rating: ★★★★☆
Features:
-
Designed for long runs (40–60 feet)
-
Often used in commercial applications or large agricultural buildings
-
High seams and deep ribs channel water efficiently
Pros:
-
Resists ponding and snow buildup
-
Strong in high-wind areas
Cons:
-
Industrial appearance (less suited for homes)
-
Requires structural deck or open framing
Top Tier Use Case: Post-frame buildings, carports, pole barns, and warehouse roofs.
4. What About Corrugated or R-Panel on Low-Slope Roofs?
While popular for sheds, barns, and garages, corrugated panels and R-panels are not ideal for low-slope roofs without additional waterproofing.
Why:
-
Exposed fasteners mean high leak potential
-
Water can pool between ribs
-
Fastener seal washers degrade over time
-
Not rated for slopes below 3:12 unless installed over waterproof underlayment
Top Tier Workaround: Use ice & water shield full coverage underneath, and check that fasteners align directly into structural supports every 24 inches or less.
5. Best Underlayment for Low-Slope Metal Roofs
Use a Two-Layer System:
-
Full-coverage ice & water shield membrane
-
Synthetic underlayment or slip sheet between membrane and metal panel
Why it matters:
Metal can expand and contract. Without a slip layer, it can stick to the membrane and tear it over time.
Underlayment Must-Haves:
-
High-temp rating (at least 250°F)
-
Class A fire rating (especially near chimneys or solar arrays)
-
Self-sealing around fasteners
6. Seam Sealants and Mastic: A Must-Have on Low Slope
On any seam under 3:12, sealant is not optional — it’s required by most panel manufacturers and roofing codes.
Use:
-
Butyl tape or mastic inside seam folds
-
High-temp polyurethane sealant at flashing overlaps
-
Ridge and rake closures to prevent water, wind, or insect intrusion
Always refer to manufacturer install guides and warranties — improper sealing voids most warranties on low-slope installs.
7. Flashing and Waterproofing Details to Watch
Low-slope metal roofs depend heavily on flashing detail and execution. Focus on:
-
End laps: Use a min 6” overlap + butyl tape + fasteners every 6”
-
Eaves: Install drip edge with hemmed panel ends
-
Valleys: Always use W-style valley flashing with raised center rib
-
Penetrations: Use high-quality pipe boots + rain collars + redundant sealant
Top Tier Tip: Never use caulk alone — combine mechanical overlap, butyl tape, and polyurethane sealant at all flash points.
8. Maintenance Requirements on Low-Slope Metal Roofs
Because low-slope surfaces hold water and debris longer, they require slightly more frequent maintenance than steep slopes.
Annual Checklist:
-
Clear leaves, ice, and snow to prevent ponding
-
Inspect all fasteners and ridge caps
-
Clean panel surface to remove corrosive agents (bird droppings, sap, salt)
-
Reseal any cracked boots or sealant lines
9. Warranty and Code Compliance Tips
-
Most manufacturers require mechanically seamed panels below 3:12
-
Snap-lock and exposed fastener panels may void warranty on low pitch
-
UL-90 rated assemblies are often needed in commercial/flat roofing
-
Verify IBC and local code for fire ratings and slope minimums
Top Tier Tip: Ask us for a pre-approval checklist if you’re building in a coastal or hurricane zone — we’ll help make sure your roof meets both performance and paperwork standards.
Final Thoughts: Build Low, Build Smart
Low-slope metal roofs require precision, planning, and the right panel system. But when done right, they offer unmatched performance, clean aesthetics, and energy savings for years.
Whether you're roofing a modern farmhouse, a commercial property, or an outdoor patio, Top Tier Metals offers the high-performance panels, waterproofing materials, and installation guidance to help you get it right the first time.
Need a Quote or Panel Match for Your Low-Slope Project?
We’ll custom-cut panels to your specs, recommend compatible flashing kits, and guide you on code-compliant installation.
👉 Contact Top Tier Metals
Your roof doesn’t need a steep pitch to deliver high performance — it just needs the right system.